
How to Organize Your Pantry So It Works for You (Not Instagram) and Keep It That Way
A well-organized pantry lets you find what you need quickly, cuts down on food waste, and avoids avalanches of poorly stacked dry goods falling down around you. But the ideal setup doesn’t necessarily look like the hyperstylized, celestial-homemaker fever dreams you may have scrolled past on Instagram.
“People get really excited about the nice-looking bins and containers they see online, then buy them without any planning,” Katrina Green, a professional organizer and former board member of the National Association of Black Professional Organizers (NABPO), said in a phone interview. “You have to first consider what you and your household need in a pantry system, as well as what your pantry can accommodate.”
Whether you’re working with a single shelf or a whole walk-in, this step-by-step process will help you organize your pantry—and, just as importantly, keep it organized—so that it works for you.
Start by emptying out your shelves
Move your pantry’s contents onto a nearby counter or table. (If you’re already feeling overwhelmed, it’s fine to begin by tackling just a portion of your pantry, said senior editor Marguerite Preston, who heads Wirecutter’s kitchen team.)
Take stock of everything you have—including items you don’t need. Set aside the following items to toss or give away:
- any near-empty containers of stuff you seldom use
- items that are near or past their expiration dates (a good indication that you’re not using some things often enough to justify keeping or restocking them)
- anything you didn’t remember you even had in your pantry
Organize items by theme, not size
Grouping together items of similar size and shape may maximize space, but it won’t help you quickly find what you need when you need it. Instead of placing, say, all 14-ounce cans or 18-ounce jars together, sort your foodstuffs into themed categories, Naeemah Ford Goldson, a professional organizer and NABPO founder, said in a phone interview. (Goldson previously spoke with Wirecutter for our guide to closet organization.)
Some of these categories will be obvious, including:
- snacks
- baking supplies
- drinks and drink mixes
- condiments and spreads
- oils, vinegars, broths, and other cooking liquids
Other categories may be more conceptual. For example, if you frequently make spaghetti and meatballs for dinner, Goldson said, you may want to group together those ingredients (pasta, canned tomatoes, bread crumbs, and so on).
If you’re having trouble figuring out how to categorize everything, think about how foodstuffs are grouped in a grocery store’s aisles, and then use that as a guide. “In a grocery store, things aren’t in identical containers—but because everything has a place and like items are together, it still looks neat and organized,” Goldson said.
Plan out your pantry’s “zones”
Each group you’ve just established should receive its own designated spot (or “zone,” as Green calls it) in your pantry.
Zones can vary in size. One zone might comprise an entire shelf or two, while another might consist of a bin that takes up just a sliver of space. To designate zones in her own pantry, Green uses a set of handled plastic bins from The Container Store, which are inexpensive (about $5 a bin) and easy to clean. Lesley Stockton, a senior staff writer on our kitchen team, likes Uline Plastic Stackable Bins, which come in an incredibly wide variety of colors and sizes.
But before you start loading bins into your pantry, you’ll probably need to use a tape measure to ensure that all of your zones (whether or not they’re contained in bins) will fit. If you have more zones than room to put them in, you may also need to combine groups. For example, those aforementioned spaghetti ingredients could be part of a “staple meal” zone that also includes things you need to make tuna salad or rice and beans.
Locate zones according to how quickly you need to access them. Zones containing your most frequently used items should be placed where you can easily and quickly reach them. With time, you should be able to grab stuff from these higher-trafficked zones without even looking.
Add a “miscellaneous” zone to house hard-to-classify items. This zone can include seasonal foodstuffs (such as holiday candies, hot cocoa, and s’mores fixings), as well as those one-off ingredients you buy on a whim and then tend to forget about. And if you have small children, Goldson suggests setting up a zone on your pantry’s lowest shelf to give them self-serve access to snacks or drinks.
Create more storage as needed
If you still don’t have enough room for all of your zones—or you don’t have a pantry to begin with—our experts have a few suggestions.
- Add a freestanding cabinet. Senior staff writer Tim Heffernan said a low-slung piece of furniture, like the IKEA PS Cabinet, can serve as a makeshift pantry and a whole lot more. “It’s got solid shelves, which are easier to clean than wire shelves. Its doors put your clutter out of sight. And its flat-top surface can be used as an extra food-prep area or to store small appliances,” he explained.
- Repurpose a bookcase. Even if it’s not that tall, a bookshelf with a depth of 12 to 18 inches can store plenty of pantry staples, Goldson said. If you’re worried that the shelves will get sticky, or you just don’t like the look of a bookcase in your kitchen, consider lining the shelves with contact paper.
- Use wire shelving. Industrial racks from commercial-supply brands like Uline are incredibly sturdy, but they can also be expensive. Green recommends using an affordable chrome-coated wire rack from Amazon Basics. This rack comes in different sizes, all of which have adjustable shelving and a listed weight capacity of 250 to 350 pounds per shelf. (Lesley said she’s seen cheap wire shelving buckle under the weight of too many canned goods.) Since wire racks can be annoyingly difficult to clean, you might want to spring for a set of Gorilla Grip shelf liners specifically designed for wire racks; they even have rounded corners to accommodate your shelves’ corner posts. Senior staff writer Doug Mahoney, who uses these liners on the wire racks that comprise his basement pantry, said they “make the shelves a thousand times better.”
Choose storage containers wisely (or skip them altogether)
Some foods do just fine in their original containers, including items that are used quickly, that don’t need an airtight container to stay fresh, or that come in sturdy packaging (beware flimsy, shapeless, un-resealable bags!). And if you know you’re not the type who's going to decant pantry goods into canisters, there’s no rule that says you must use them. (Take that, Instagram!)
When you’re thinking about what type of dry-food storage containers will suit you best, there are several factors to consider.
Containers with an airtight seal will keep items fresher for longer. For longer-term storage of many pantry items, you need to use containers that will lock in freshness. Our top-pick dry-food storage container set, the Rubbermaid Brilliance Pantry Food Storage Containers, kept Goldfish crackers crunchy for three weeks—longer than any other canisters we tested.

These durable, well-sealed plastic containers fit easily in most cabinets. They come in many sizes, stack securely, and are easy to scoop or pour from.
Buying Options
Price includes shipping
Consider using containers made of a transparent material. If you can see what’s inside food containers, you’ll know when you’re running low on certain ingredients and need to restock.
Stackable containers work well. If your pantry shelves are spaced widely apart, make the most of that space by using stackable containers (especially sets that come in varying volumes).
Measure to be sure they’ll fit. Do not buy containers before making sure your shelves can accommodate them. Containers that are as deep as your shelves work especially well, to cut down on items getting lost in the back.
Our two top picks for the best dry-food storage containers—the Rubbermaid Brilliance Pantry Food Storage Containers and the Rubbermaid Commercial Space-Saving Square Food Containers—are made of see-through plastic. And they have the tightest lids of all the containers we tested. Marguerite said she especially likes the latter set for storing baking ingredients and supplies. “They’re easy to scoop from because they’re so wide,” she said. “They’re also big and wide enough that I can use them to store my decorating odds and ends, like sprinkles, food coloring, piping tips, etc.”
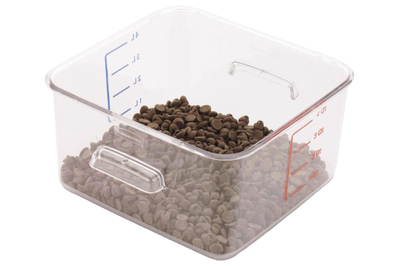
These containers are designed for use in restaurant kitchens, so they’re incredibly sturdy. They also come in sizes ranging from 2 quarts to 22 quarts. But they’re bulky and better for those with a lot of space.
For a no-cost storage solution, repurpose deli and takeout tubs. These containers stack well, are typically see-through, and usually offer a good seal. Keep in mind, however, that they may not maximize your space or offer enough storage for ingredients you use in large quantities (like flour if you bake a lot). “Because they’re both tapered and round, they leave you with a lot of unused space between containers,” Marguerite said. “They also don’t come in any size options larger than a quart, which is too small to fit standard amounts of staple ingredients, like a 4-pound bag of sugar or even a box of cereal.”
Consider glass containers, if you want to avoid using plastic. We like Williams Sonoma Hold Everything FSC Stacking Glass Square Canisters, which stack nicely and have a good seal. Many Wirecutter staffers also rely on canning-style glass jars from companies like Ball and IKEA, which seal very tightly. But, as we note in our dry-food storage-container guide, they’re also “breakable, they don’t always stack, most won’t fit a measuring cup, and their sizing can be limited.”
Labeling is largely optional
“Labeling is not that big of a deal. It really depends on the user,” Green said. If you’re leaving items in their original packaging and decanting others into see-through containers, you’ll mostly be able to identify stuff by sight anyway.
However, if you have a lot of similar-looking ingredients (such as different types of flour), if uniform labels will help you find items faster, or if you just love the look of labels, then label away. Many professional kitchens (both real and pretend) use painter’s tape and a permanent marker to label items. This tried-and-true method works particularly well if you plan on restocking your containers with different ingredients from time to time.
On the other hand, sometimes a container will always hold the same thing—for example, if you have a dedicated rice tub. In that case, Marguerite said, “You might be happier using a label maker to add a neater, more permanent label.”
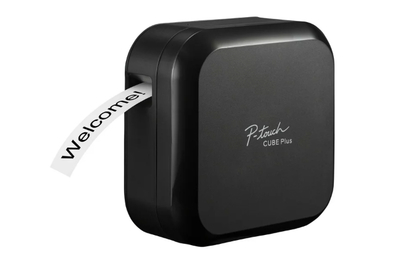
This label maker trades a built-in screen and keyboard for an easy-to-use smartphone app. It’s compact and portable, prints quickly, and automatically cuts labels. And Brother’s design software offers plenty of customization options.
If you want permanent labels, but you don’t want to bother typing them out: Order a set of preprinted labels. Goldson likes mDesign’s Household Label Sticker Sheets.
Should you choose to forgo labeling individual items, Goldson said she sometimes puts labels only on the front of shelves, to identify different zones. This can be particularly helpful if multiple members of your household use the pantry (but perhaps don’t know its layout as well as you do). Similarly, Green said she sometimes recommends that clients label pantry areas or items until they become familiar with where everything is located, at which point the labels can be removed.
Get the right items for deep shelves and dark corners
We’ve all lost track of pantry items that have disappeared into a black hole of nothingness somewhere in the back. As mentioned above, using bins or storage containers that are as deep as your shelves will help alleviate this problem. Using tiered risers—such as The Container Store Expand-A-Shelf, which we suggest in our roundup of solutions for small kitchens—can also help.
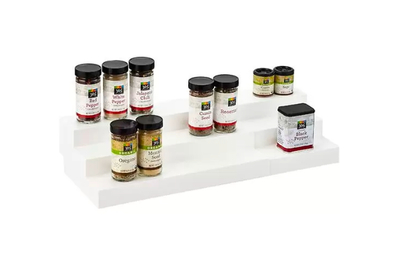
This three-tiered expandable shelf is excellent for storing spices, so they’re well organized and easy to reach.
Buying Options
In addition, Goldson and Green recommend placing a lazy Susan in recessed corners, where things can get lost. Our top pick, the OXO Not So Lazy Susan Turntable, comes in multiple sizes. Marguerite said she finds it especially useful for storing bottled and jarred items.
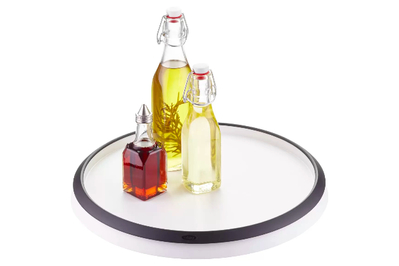
This turntable helps to maximize shelf or counter space, and it makes it easier to find items in hard-to-reach places.
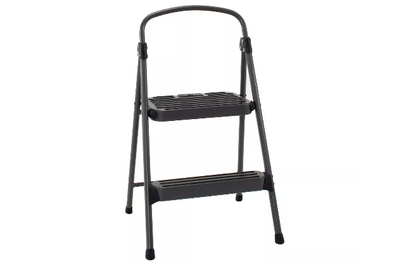
This sturdy, lightweight step stool holds up to 225 pounds, and it’s easy to fold and unfold.
Buying Options
If your pantry has a deep shelf that’s higher than you can reach, the best way to make that space user-friendly is to keep a step stool nearby. We’ve previously recommended several sturdy, foldable, two-step stools in the $40 range, including the Cosco 2 Step All Steel Step Stool. Deep shelves that are located closer to the floor can be optimized by installing roll-out shelves (Goldson likes these from The Container Store). But for a free, no-installation-needed alternative, you can line a low shelf with an old, rimmed baking sheet and use it to slide things in and out.
How to maintain your pantry
Once your pantry is organized (congrats!), the best way to keep it neat is to merge any maintenance with your grocery-shopping routine.
Before you write up a grocery list, Green said you should “shop your pantry first” so you know what you do and don’t need more of. (This is also a good time to thin out stuff you won’t use again.) Goldson said that after she returns from the supermarket, she likes to put groceries away and tidy up her pantry at the same time. “That’s when you replace things in canisters, line up snacks for your little kids to grab, corral all your bags of chips together, and so on.”
One of the biggest benefits of practicing good pantry maintenance, Green added, is that you’ll likely buy fewer splurge items. Even though something may look fun at the store, it probably doesn’t have a place in your system, and that means you probably won’t get around to actually using it.
This article was edited by Annemarie Conte.
Mentioned above
- We spent 42 hours on research and consulted five professional organizers to find the best tools for tackling messy closets of every size.Closet Organizing Ideas
- We taste-tested 15 bottles of widely available extra-virgin olive oil. Here are our favorites.The Best Olive Oil You Can Buy at the Store
- We tasted 15 store-bought chicken broths and stocks and found a huge range in quality, with a few that rose above the rest.The Best Chicken Broth and Stock You Can Get in the Store
- We spent 45 hours researching, dropping, extending, and scrubbing the blades of 17 tape measures with 60-grit sandpaper. Read on to see what we recommend.The Best Tape Measure
- After testing 19 food storage container sets over the years, we recommend the Rubbermaid Brilliance Containers and the Rubbermaid Commercial Containers.The Best Dry Food Storage Containers
- Here is every Wirecutter pick we could find in The Bear’s first season.‘The Bear’ Is Back. Here’s Every Wirecutter Pick We’ve Spotted in Carmy’s Kitchen.
Further reading

How to Organize Your Kitchen Cabinets
by Rose Maura Lorre
Kitchen-cabinet clutter out of control? Follow our user-friendly guide to keeping cabinets neat and organized.

9 Tools to Organize Your Kitchen Like a Pro
by Janelle Zara, T Magazine
Organizing your kitchen can make it more functional—and beautiful. In collaboration with T Magazine, we have tips to keep your tools and ingredients in order.

Small Kitchen Ideas: The Best Ways to Create More Space
by Michael Sullivan
After dozens of hours researching and testing organizing options, we recommend more than 20 items to make the most out of your tiny kitchen.

This $20 Lid Organizer Has Tamed the Chaos Inside My Kitchen Cabinets
by Rose Maura Lorre
Food storage container lids are incredibly annoying to deal with—unless you have the YouCopia StoraLid Container Lid Organizer.


