
Color categories allow you to easily identify and group associated items in Microsoft Outlook. Assign a color category to a group of interrelated items—such as notes, contacts, appointments, and email messages—so that you can quickly track and organize them. You can also assign more than one color category to items.
You can choose from a set of default categories or create your own, and then assign the categories to your Outlook items. The category colors are displayed in your Inbox, and within the open items themselves. You can rename the categories to something more meaningful to you or choose different colors for the categories. This flexibility enables you to design a color category system that fits your personal work style.
Note: If you are using Outlook with an IMAP account, you cannot assign categories to an item. The IMAP email account type does not support categories.
Select a tab option below for the version of Outlook you're using. What version of Outlook do I have?
Note: If the steps under this New Outlook tab don't work, you may not be using new Outlook for Windows yet. Select the Classic Outlook tab and follow those steps instead.
In new Outlook, you have the following options:
Assign a color category | Rename a color category | Create a color category
Assign a color category to an email message
-
To assign a color category to a message from the message list, right click the message.
-
Select Categorize, then select a category from the list. If you want to assign a second or third color category, you can perform this action multiple times.
-
To assign a color category from the reading pane or an open message, select Categorize on the ribbon and then select a category from the list.
Note: The Categorize drop-down displays the most recently used categories. If you have additional categories, you'll need to select Manage categories to get the rest of the list.
Rename a color category
The default color categories have generic names, such as Red Category and Blue Category. To easily identify and organize your categorized items, you can rename the color categories by using names that are meaningful to you.
-
On the ribbon, select Categorize, then Manage categories.
-
Select the edit

-
Rename the category then select Save.
Create a color category
-
On the ribbon, select Categorize, then New category.
-
Name your category, then select Save.
-
Your new category will be listed in Categorize.
In classic Outlook, you have the following options:
Assign a color category | Rename a color category | Create a color category | Set a Quick Click category | Assign a shortcut key to a category
Assign a color category to an email message
-
To assign a color category to a message from the message list, right-click the message.
-
Select Categorize, then select a category from the list. If you want to assign a second or third color category, you can perform this action multiple times.
Tip: If you right-click the message and you only get options to flag the message, try right-clicking in the blank space to the right of the sender's name.
To assign a color category from the reading pane or an open message, select Tags, then Categorize on the ribbon and then select a category from the list.
Note: The Categorize drop-down displays the ten most recently used categories. If you have additional categories, you'll need to select All Categories to get the rest of the list.
Rename a color category
The default color categories have generic names, such as Red Category and Blue Category. To easily identify and organize your categorized items, you can rename the color categories by using names that are meaningful to you.
Notes:
-
The first time that you assign an existing color category to an item, you will be prompted to rename the color category.
-
If you change a color category that is already assigned to items, all of the items that have that category assigned are updated to the new name.
-
On the toolbar, select Categorize

-
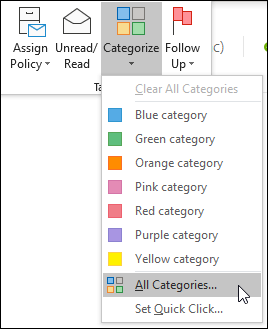
Select All Categories.
-
In the Name list, select the name of a color category, and then select Rename.
-
In the Name list, type the new name for the color category.
To automatically assign the color category that you are renaming to items that are selected in the main Outlook window, select the check box next to the color category in the Name list, and then select OK.
Create a color category
-
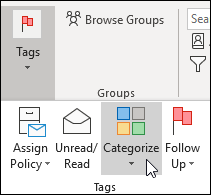
In any message folder, in the Tags group on the Ribbon, select Categorize, then All Categories.
Note: For calendar items, the Tags group appears on the Appointment or Meeting tab. For an open contact or task, the Tags group appears on the Home tab.
-
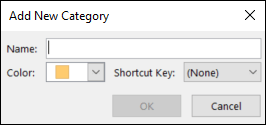
In the Color Categories dialog box, select New.
-
Type a name for the category and select a color and optionally, a shortcut key. Then select OK.
Set a Quick Click category and assign it to messages
A Quick Click category is a default category that you can set in certain table views. For example, if you turn off the reading pane or move the reading pane under your message list, you'll see additional columns in your Inbox, including Received, Category, and Mention. To assign a Quick Click category in one of these views, you can click in the category column to set a category.
-
On the ribbon, in the Tags group, select Categorize > Set Quick Click.
-
Use the drop-down to select a color category, then select OK.
Tip: From an open message, you can click Set Quick Click on the Categorize menu to set the default color category for all future messages, not just the message that is selected.
Assign a shortcut key to a category
By associating a keyboard shortcut key with a category, you can quickly assign the category to an item, such as an e-mail message, by selecting the item in your Inbox or another category view and then pressing the shortcut key. You can also use the shortcut key to assign a color category to multiple items at the same time.
-
On the toolbar of the main Outlook window, select Categorize
-
At the bottom of the menu, select All Categories.
-
In the Name list, select the check box for a color category.
-
In the Shortcut Key list, choose a keyboard shortcut.
In Outlook, you have the following options:
Assign a color category | Rename a color category | Create a color category
Assign a color category to an email message
-
To assign a color category to a message from the message list, right click the message.
-
Select Categorize, then select a category from the list. If you want to assign a second or third color category, you can perform this action multiple times.
-
To assign a color category from the reading pane or an open message, select Categorize on the ribbon and then select a category from the list.
Note: The Categorize drop-down displays the most recently used categories. If you have additional categories, you'll need to select Manage categories to get the rest of the list.
Rename a color category
The default color categories have generic names, such as Red Category and Blue Category. To easily identify and organize your categorized items, you can rename the color categories by using names that are meaningful to you.
-
On the ribbon, select Categorize, then Manage categories.
-
Select the edit
-
Rename the category then select Save.
Create a color category
-
On the ribbon, select Categorize, then New category.
-
Name your category, then select Save.
-
Your new category will be listed in Categorize.


